

I first saw top stitch appliqué in a machine appliqué class a number of years ago. Since then I have seen a couple of examples of a hand appliqué, running stitch in the "old quilts." I vaguely remember one that was done using white thread. It was charming. I have also seen samples in class with Elly Sienkiewicz where large shapes were appliquéd down using a small running stitch and either silk or fine cotton sewing weight thread. The stitches were practically invisible and the benefit was that a wreath could be sewn in a single evening.


I also love Big Stitch hand quilting. That is a technique where a quilt is hand quilted using pearl cotton.  Instead of making the stitches tiny, the objective is to make the stitches noticable, even, and part of the overall artistic expression/design.
So I decided to use a hand sewn, running stitch to appliqué my piece and have the stitch mimic big stitch hand quilting. That way when the appliqué is complete and I quilt the piece, the quilting and appliqué will blend. If you look closely, the appearance is that I hand quilted a row of stitches about 4 threads from the edge of the appliqué.
I just love this look! Very carefree, clean, and casual. I can dress it up or down by selecting different fibers for the running stitch. It's also extremely quick and easy. It incorporates needle turn which I love. 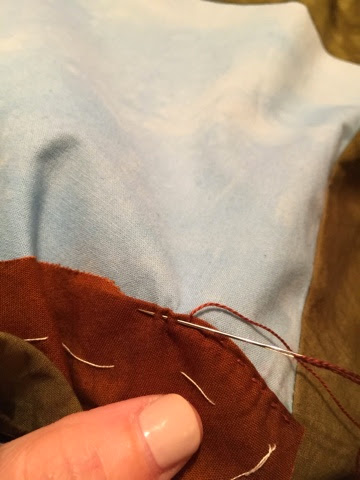 There are no glue or starches which I don't enjoy. It's completely portable. I probably would not use this technique on an heirloom quilt or bed quilt that will get lots of wear and washing. But for my wall hanging, decorative pieces I find it just right!
I will use the same stitch to sew all the leaves at random. I will continue to post photos of the progress in days to come. Let me know if you decide to try out this technique and what you think.
Until next time,
Best stitches from Mercy in sunny Miami


