Friday, March 28, 2014

My (Quilt) Heroes Have Always Been Cowboys


Little Cowpokes Fabric | Discount Cowboy Scenes Fabric | Carousel Designs
I have always been in love with the romantic legend of the cowboy.  However, this love affair only extends to the singing and Saturday afternoon matinée version of the cowpoke; and their spirit of independence.  My favorite definition is number three in the Merriam-Webster dictionary “someone who does things that other people consider foolish and dangerous.”  Based on this description, I am a cowboy quilter!  Furthermore, my quilt heroes are also cowboys!

I hand applique!  I hand embroider!  I hand piece!   And, I proudly machine quilt!  I quilt because fabric is my artist medium.  The needle, whether guided by my hand or my sewing machine, is my brushwork.  In painter’s terms, hand applique and hand piecing is my underpainting.  Hand embroidery is my glazing and opaque touches.  Hand quilting is the line drawing, the gesture, and the sculptural element of the brushstrokes.

Just as painters apprentice by studying the masters, I too apprentice by studying the quilt masters and encourage all of you to do the same.  I mention my heroes frequently in my blogs and if you notice the areas just to the left and right of this page you will see many, many links to my heroes' blogs and websites.  I frequently browse their sites for education and inspiration.

Today’s tip is an oldie but a goodie.  I always have a hand project packed and ready to go when a road trip presents itself.  In this case, it’s the Mystery in the Smokies by Cindy Blackberg.  I am still working on the first installment that requires embroidery with three separate balls of 12 wt pearl cotton.  The way I keep everything neat and keep the thread from tangling is by placing the three balls in a ziplock bag.  I then thread each ball, one at a time and pull the thread out through the side of the plastic bag leaving a tail hanging.  Every time I need a color just pull the tail and clip off what I need.  Sweet!

Until next time…
Best stitches,

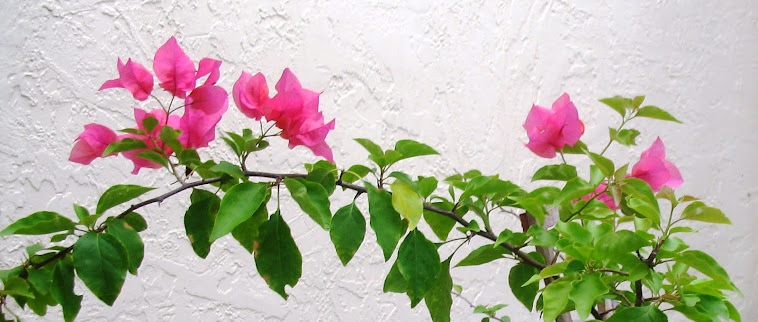
Mercy in Miami where the avacado tree is STILL producing :)
Monday, March 24, 2014

BAS and the Peahen Block from Captain Aust Quilt Top

Peahen block from Captian Aust Quilt Top in progress
Happy Spring dear blog readers!

For those following my musings, you may be aware that one of my favorite applique styles is the fancy style exemplified by the Baltimore Applique Quilts. There is a terrific organization, the Baltimore Applique Society, which is dedicated to the preservation of quilts, many in my beloved style, and the promotion of the art of applique. From their website "The Baltimore Appliqué Society (BAS) was formed in 1993 with the mission to preserve antique quilts and promote the art of applique. Since our inception, BAS has supported the preservation of quilts, textiles, and related documents in museum and historical society collections, such as the Maryland Historical Society (MdHS), the DAR Museum, the Quilters Hall of Fame, the Lovely Lane Museum, and the Baltimore Museum of Art. That support includes financial contributions, quilts made as fundraisers, reproduction patterns, and hands-on conservation work."

This fall, BAS, is holding an online auction of wall hangings made by members to raise funds to continue the work of documenting and preserving the quilt collection of the MdHS. I am stitching and will be donating a wall hanging featuring the Peahen Block from the Captain Aust Quilt Top pattern drafted by BAS members Margo Cramer, Eleanor Layman and Marylou McDonald. As the date of the auction approaches, I will provide more details.

I use a seam ripper to slit top fabric
Eye will be reverse appliqued
In the meantime, I wanted to share progress on the block and demonstrate a favorite tip. Notice that the opening where Peahen's eye will appear is reverse appliqued. I like to use a seam ripper to make a slit in the top fabric. This does not guarantee you will not slice through the underneath fabric, but if you are careful, its way less scary!


The peahen comes to life with just a few embroidery stitches
in 50wt sewing thread
The eye is lifeless
without embroidery
Notice the embroidery details in the eye and how it brings the entire hen to life. This is a wonderful technique I learned from an incredibly talented needle artist, Sandra Leichner. If you are not familiar with her work, please take a minute to check out her site. If you are like me, after one look at her work, you will be so inspired your work will never be the same again!

Beautiful fabrics hand-dyed by Sharon Schamber
Speaking of talented needle artist, the gorgeous hand-dyed fabrics in the hen's tail feathers and body where a gift from Sharon Schamber. I was on the fence about whether to stitch the hen as in the original quilt or to turn her into a peacock instead so that I could use teals and blues. But when Sharon shared a stash of this beautiful tan, gold, and rust fabrics with me I knew I had to use them for this project! It was simply meant to be :)

Until next time....

Best stitches

Mercy in hot Miami

Friday, March 14, 2014

Extra Large Applique Shapes the Template Free Method

My Mom's front yard
Happy Friday everyone! 

Large basted shape - front
In honor of National Quilting Day tomorrow, March 15th, 2014, I would like to share one of my all time favorite tips for back basting very large applique shapes.

Large basted shape - back
Basically, the tip is that you baste the entire shape as usual.  Then, you snip a basting thread every 4 - 5 inches.  This relaxes the tension on the basting thread and allows the large applique shape fabric and the background to move and shrink together in your hand at the same rate as you needle turn.  Otherwise, as you needle turn you may notice that the background fabric shrinks a little more than the applique fabric as you stitch. 
 
I use my hand to gauge where to clip to relax the basting
close up of where I have clipped the basting stitches
Best stitches!  And, Happy National Quilting Day!!
Mercy in Miami


Monday, March 10, 2014

Basket Obsesson

Basket Block of Eggleston Quilt
For over a year now I have been obsessed with a basket block in a quilt on display at the Abby Aldrich Folk Art Museum in Colonial Williamsburg.  The Eggleston Quilt is spectacular and I plan on interpreting several of the blocks. However - this basket in particular has captured my imagination.  Intellectually, I could make an argument that the simplicity of the design appeals to my artistic sensibilities - or such like nonsense.  The truth is I just love it!  It's like a gesture drawing of a Baltimore-style block.

This weekend I finally had an opportunity to start my version of this block.  Since the block requires about 40 inches of one quarter inch bias, I decided to snap a few photos of how I choose to make and apply bias in order to share my technique with my blog readers.  There are dozens of ways to make bias and lots of gadgets.  What I am sharing with you is the method I enjoy because it's totally portable - no iron, no sewing machine, and no gadgets.  I can make bias anywhere that I can set up to hand stitch. 

To make 1/4" bias I use 3/4" masking tape as a "guide" to cut strips of fabric with my scissors.  Or, when cutting fabric for projects and I see fabric that is a good candidate for bias strips, I will use a rotary cutter and mat to cut and assortment of strips ranging from  1/2 " to 1" and then put them away for later use.
I fold the strip of bias into thirds in my hands and baste the fold.  The basting process goes very quickly and I was able to make all the bias needed for my basket in about 20 minutes while sitting in the living room with my husband watching TV.

Yes I know I can make this same bias in a fraction of the time using my sewing machine and iron.  However, I chose to do as much sewing as possible by hand and in the company of my family. For me it's relaxing and I love how soft and pliable the bias turns out.


I know the next question is going be "Do you back baste bias strips?"  The answer is "kind of."   I mark by entire pattern from the back in the manner of back basting.  However, I only mark a single line, down the middle to mark where a bias strip needs to go.  

I then baste on that pencil line from the back.  The basting line shows on the front and marks where the strip needs to go.  Again, yes, I know I can do this a lot faster using light box or an overlay or ...  This is how I chose to do it.  It's like zen stitching... just me and the fabric and a needle and a length of thread.

I then basted the bias strips in place.  The basket base is back basted in the usual manner.  Everything is perfectly placed.  I laid out and basted the bias strips on the block while enjoying the weather on the front porch. So relaxing.

Until next time,
Best stitches from Mercy in sunny Miami

Monday, March 3, 2014

I Dyed and Went to Heaven


I took this wonderful class on Saturday on Ice Dyeing. It was fabulous. The process is VERY easy and the results very dramatic!
One of my first attemps.  A single 2 yard cut that graduates from
pink to orange to purple to blue and back to pink

Basically, you soak fabric in a water and Soda Ash solution to prepare the fabric to receive the dye.  Then you wring out the fabric and scrunch into interesting hills and valleys.  Cover the fabric with ice cubes.  Sprinkle Fiber Reactive Procion Dyes over the ice cubes.  As the cubes melt and soak into the fabric they, they transport the dye into the weave.


When the ice cubes are clear, you are done.  Rinse the whole mess under cold water until the water runs clear.  Then, throw into the washing machine with a cap full of synthrapol.


I love the results!  I can't wait to try this out at home in the comfort of my own backyard where I can take my time and really play with the colors.
Over dyed a hideous piece of commercial fabric.
The photo does not do justice to the beautiful
greens I was able to achieve.  I love it now.

50 shades of grey.  Love it!


Another 2 yard piece.  Blue to violet to magenta to pink and back

Very soft grey blue in the center surrounded by hot pink and orange.  And I have
2 yards to play with!  Yay me!

Right now, I'm thinking that these fabrics are candidates for Hawaiian-style applique.  I'm thinking the pink/orange has a bird of paradise in it's future. The blue some type of trumpet flower.  I'm still waiting for the soft grey to speak to me.

Until next time,
Mercy in warm and sunny Miami