©2010 All rights reserved. This tutorial is for your personal use only. All contents are protected by copyright and may not be reproduced for any use without the written consent of New World Quilt Company.
 |
Begin with a pattern, any pattern. This works for all applique styles. Mark the horizontal and vertical center lines on the pattern. |
 |
| Finger crease background fabric in half lengthwise. |
 |
| Line up lengthwise crease marks and crease widthwise. |
 |
| Open creased background fabric right side up. |
 |
Line up the center markings on the applique patterns with the crease marks on the background fabric |
 |
| Pin the background fabric to the pattern so that nothing shifts |
 |
| Flip over the background fabric and place it on a light box |
 |
| My favorite marking pencil is an inexpensive .5mm mechanical pencil |
 |
Mark as accurately as possible. From this point forward this is your only guideline. Remove the pins and pattern. |
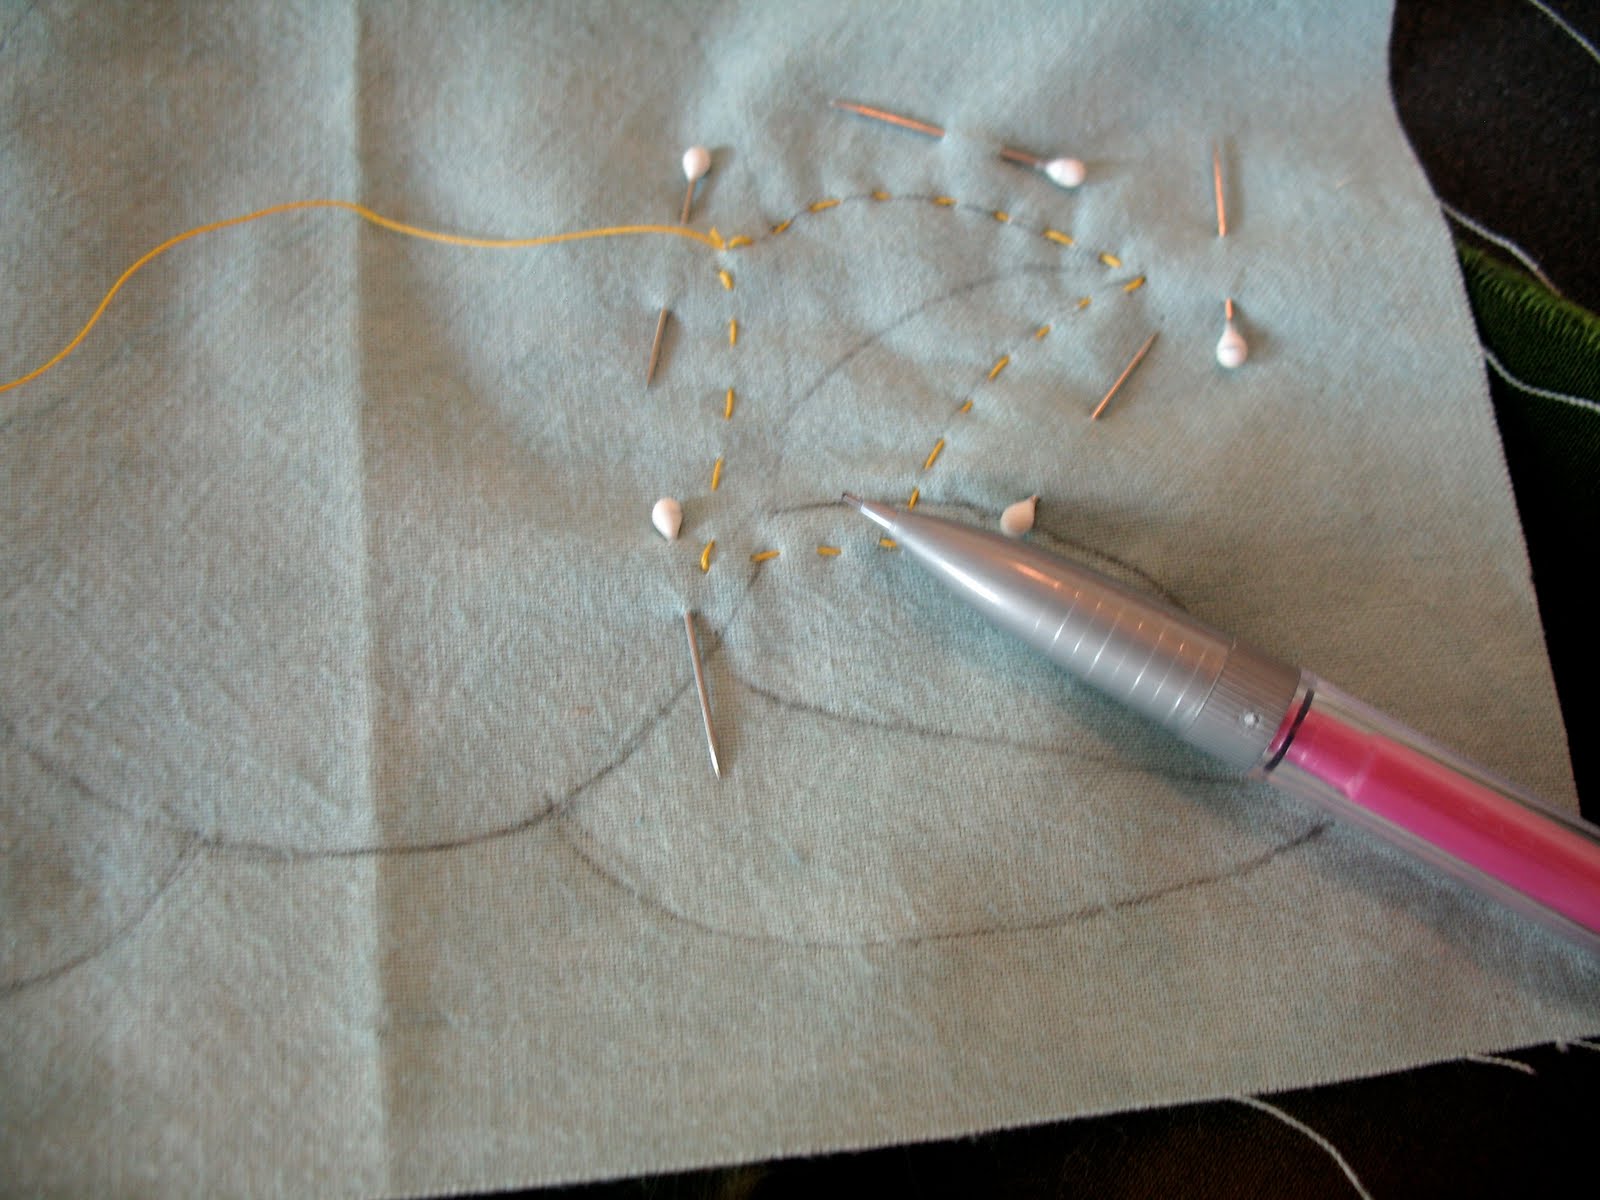
 Now you are ready to applique. Order matters. Study the pattern and select the shapes that are underneath other shapes. These need to be tackled first. In the example on the left the pencil is pointing to the MOST underneath shape; the back leaf.
 |
| Lay the applique fabric for the leaf shape right side down (wrong side up) on a flat surface. |
Lay the background fabric right side down (wrong side up) over the applique fabric. Pin closely around the pencil lines that define the shaped to be appliqued. Notice the shapes that go under another shape. Those edges should not be turned under but instead lay as a fabric tab or flap under the applique shape that will cover it.
 |
Next thread a fat needle with fat thread. |
Thread a FAT needle (I prefer a size 8 Sharp or Straw) with thick, glazed hand quilting thread and begin basting directly on the pencil line that defines the applique shape. The purpose of the basting is to define and score the applique turn line. Therefore, baste with stitches small enough to define the shape accurately. The fat needle and glazed thread do the best job of scoring the line. This is not the time to use up old, fuzzy threads. They are not strong enough to score the line.
 |
| Basted applique line and "under" line |
Baste directly on the pencil line everywhere that the the edge will be turned under and appliqued down. Baste a scant 1/8 inch outside of the pencil line everywhere that the fabric will NOT be turned under. These "under" edges will be fabric tabs that will lay under another applique fabric. In the example on the left, the pencil is pointing to an "under" fabric tabs. Baste carefully. Take your time. Again, the basting stitches serve two purposes. First, the small running stitches define the applique shape accurately. Secondly, the basting stitches score the needle turn edge. If you keep this in mind will basting and you will quickly master this technique.
 |
| Trim a scant 1/4 inch to a true 1/8 inch away from the basting stitches. |
 |
| Clip every other stitch. |
Thread your favorite applique needle (I prefer a Roxanne or Jeana Kimball #12 Sharp) with your favorite applique thread (I prefer Aurifil #50 cotton). I begin by basting the "under" edges with a running stitch until I reach the first turn under edge. I then clip every other basting stitch. In the example on the left the scissors are pointing to the edge I clipped. I leave the basting stitch that defines the point in tact until I am ready to actually stitch the point.
 |
| Sweep under seam allowance and applique edge. |
Remove a few basting thread at a time. Use the shaft of the needle to sweep under the seam allowance in the same manner as any other needle turn applique technique. Use your favorite applique stitch. I prefer a classic tack stitch.
 |
| Baste and stitch first layer |
I typically baste all the applique shapes that make up the "first layer"; that is all the shapes that have no other shapes underneath them. I applique all of those shapes. When the first layer is complete, I baste the next "layer" and applique those shapes. I continue working in this method until all the applique shapes have been completed.
In this example, layer one consists of the two back leaves and the crown of leaves at the top. Layer two is made up of the two larger leaves on the bottom of the pineapple. The pineapple is the third and last layer.
Here is my yummy pineapple block ready for embroidered embellishments!
If you have any questions, feel free to contact me.
Best stitches!
Mercy


 Now you are ready to applique. Order matters. Study the pattern and select the shapes that are underneath other shapes. These need to be tackled first. In the example on the left the pencil is pointing to the MOST underneath shape; the back leaf.