Hi gang!
I have started block 9 of my Baltimore style quilt. Block 9 is a fruit basket. I'm using Sandra Leichner's pattern, Traditional Still Life. By the way, for Sandra's fans, she has made several of her patterns available for sale on her website. That will have to hold us over until her new book is published in October!
So far, I have only completed the pineapple that sits at the top of the basket. I love to applique pineapples. They are large, beautiful shapes that come to life with the simplest of embellishments. For this pineapple, I used a chalk pencil to mark a simple grid on the diagonal. I then used two strands of silk floss to make a colonial knot at each intersection. I really like colonial knots because they nestle into the fabric with the "knot" sitting upright. They are especially nice if you pad the applique piece with a thin layer of batting. The knot then accentuates the dimensionality/stuffed effect. They do not flop over like French Knots. Unlike a French knot, you cannot make the knot bigger by using more wraps. Instead to make a bigger Colonial knot you need to use more strands of floss or use a thicker floss.
Colonial knots are not as common as French knots so many quilters are not familiar with them. But, they are so quick and easy to stitch, and so versatile, that I decided to create a quick tutorial for my blog readers.
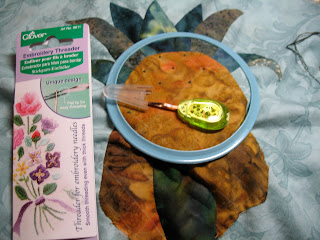
First my favorite tools. I love this Clover Embroidery Needle Threader. Unlike other needle threaders, it's sturdy enough that when you pull on it the "wire" it does not pull out or come apart in your hands. It's thin enough to thread smaller embroidery needles but has an opening large enough to thread larger fibers.
My other "Must Have" is Thread Heaven. It really does tame the most unruly threads. I wish the manufacturers also made hair care products!
 To make a Colonial knot, thread your needle, pass your floss through the Thread Heaven, and hoop your fabric. I prefer Spring Tension 3 1/2 inch Embroidery Hoop.
  Start the stitch by coming up from the back to the front right where the stitch will be. Pull the floss toward yourself with your left hand.
Point the needle away from yourself and scoop the floss from left to right.

Then with your left hand wrap the floss up, over and under the needle to create a figure eight of floss.
Gently pull the floss with your left hand until the knot is formed around the needle. Pull until the knot travel down to the tip of the needle. Then insert the needle into the background right next to where it came up originally.

As you pull the needle slowly through and out the back, control the loop on top with your left thumb.
 After you pull the floss to the back, travel between the background and the foreground to the next spot for the next knot. This helps keep the background a little neater.
The stitch is really very simple, but a little complicated to explain; especially the up, over and under step to make the figure eight. Since a picture is with a thousand words, a video should be worth a million words. Here is a short (90 second) video, How to stitch a Colonial Knot , that my husband recorded of me stitching a Colonial knot. Hopefully, between the video and the instructions/photos above you too will soon be embellishing your projects with a new stitch!
While downloading the photos for this blog I came across a few snapshots from a trip to Key West in January. The first photo at the top of the blog and the one immediately below is from Hemingway's house. The rooster and hen are from a gas station parking lot. I hope they inspire you like they do me!
Until next time....
Best stitches,
Mercy in Miami
aka The Savage Quilter


THANK YOU! An absolutely wonderful tutorial...I did follow your written instructions- but the video - sensational! If you are able, would you also show how to do a Bullion Knot? I have read the instructions, practiced, but they are difficult :( Maybe I am doing something wrong here. I need them for the owl feet in my Baltimore Halloween...thank you so much for what you have shown so far. I have pre ordered Sandra's book and can't wait til Oct! fondly, Sandy
ReplyDeleteHi Sandy,
ReplyDeleteThanks for the words of encouragement. I'm glad you are enjoying the tutorial. I will absolutely work on a Bullion Knot "how to" for you. I agree it's a bit tricky to get from just instructions in a book. Stay tuned.
Best stitches!
Mercy
Fantastic tutorial and a great post! Thank you.
ReplyDelete