Showing posts with label Lucy and Ethel. Show all posts

Sunday, October 30, 2011

2011 Round Robin Reveal...Plus This Year's Halloween Costume Parade

Autumn is a second spring when every leaf is a flower.
Albert Camus French existentialist author & philosopher (1913 - 1960)
Happy Halloween and Harvest Festival!  Of course, in Miami all the beautiful maple leaves are made of silk and the smell of apple trees is supplied by Yankee Candle.  As children we always chose our costumes to be as skimpy as possible, not because we were exhibitionist, but because it was still so hot in October.  Regardless, I love Fall so I turn the air conditioning down low, light scented candles, and scatter silk Autumn colored leaves!

Here's a sneak peek at what the best dressed dogs will be wearing for Halloween this year!
Ethel the Good Witch of the West

Lucy claims The Devil Made Me Do It

Ricky is a Four-eyed Alien


This weekend, a small group from my local quilt guild got together at my home to reveal the Round Robin (RR) quilts we have been working on this year.  For those of you are are not familiar with RR, the premise is as follows:
  1. Select a block and collect coordinating fabrics.  Put everything into a bag large enough to hold everything.  Include a label, notepad, and a disposable camera (optional).
  2. All participants meet and present their blocks and fabrics to the group.
  3. Hand off your bag to the next person in line in the group.  That person then adds a border, or embellishment, or row (depending on rules the group sets).
  4. The group meets again, at established intervals, i.e. once a month, or every two months, etc.  You hand off the bag you just finished to the next person in line again.  The original owner is NOT allowed to see their block's progress at each exchange.
  5. After every one's block has been passed to everyone in the group, the block (by this time a quilt) is passed back to the owner.  This is called the Reveal. 
I have participated in several RR's and I have always loved the results.  They are always unexpected because they are rarely what I would have done so they open me up to new possibilities and push my creative boundaries.

Mercy's Brickmaker's House Closeup

Mercy's Brickmaker's House
My center is a block I stitched as a sample for Elly Sienkiewicz's book Baltimore Elegence, entitled Brickmaker's House.  I love this block because my paternal grandfather was a stone mason.  I wanted to turn it into a wall hanging but was totally stumped as to how to finish it so I submitted it for my RR.  I LOVE how it turned out!  Thank you Robinette's!!!


Here are the other Robinette's finished quilts.  Please keep in mind that each quilt top was worked on by several individuals.  I think the creativity really comes through.  Enjoy the mini quilt top show. 
Until then...

Best stitches,
Mercy in Miami


Jen's Peacock

Jen's Peacock Closeup

Linda's Geisha

Linda's Geisha Closeup

Carol G.'s Cottage Quilt

Carol G.'s Cottage Quilt

That's me holding up Phyllis' Crazy Patch Christmas

Phyllis' Crazy Patch Christmas Closeup

Carol S.' Desert

Carol S.' Desert Closeup

Karen's Seashore

Gerry's I Love Card Tricks

Lois' Geisha

Lois' Geisha Closeup

Friday, October 28, 2011

We All Start Somewhere, Now If I Could Only Stop... Plus, Meet Ricky!

First Applique Block
As I was cleaning out a drawer in my sewing room I found the applique block that I stitched in class with Jeana Kimball a little over 13 years ago.  It was during this class that I learned Template Free (Back Basting) preparation and needle turn applique.  It was during this class that I fell in love with hand applique.  And the rest, as they say, is history. 


Poppy
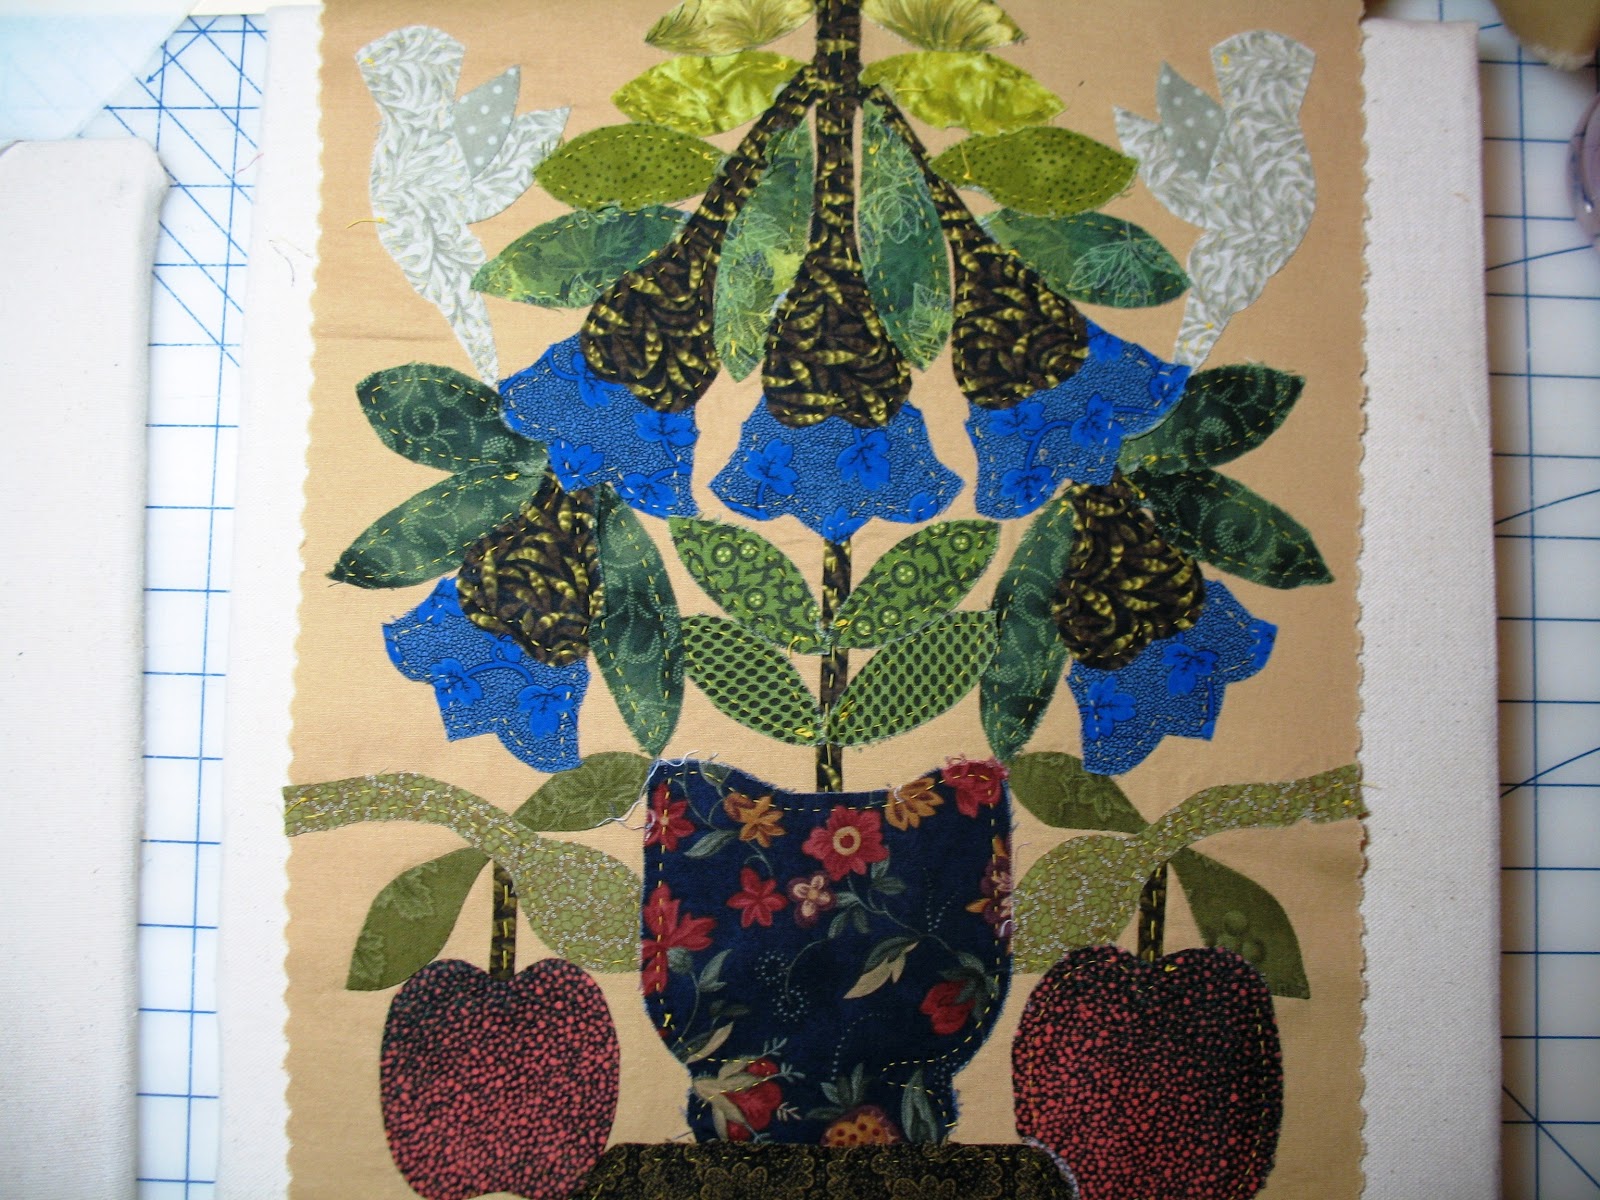
Fast forward to today.  Here is the latest block I have finished.  It is the Poppy block designed by Jeana Kimball for the Cottage Garden quilt.  I also completed the House Finch block.
House Finch


Basted and Ready to Applique
I am also working on the Civil War Bride quilt by Corlis Searcey.  I have completely basted block one. 


Fist layer basted

This is the perfect pattern to pre-baste the entire block because there is minimal overlap of the applique pieces.  How does she do that you ask?  Well, first I baste everything I possibly can without overlap of the stitching line.  Where applique pieces are very close, I move the seam allowance out of the way before I baste the piece next to it. 

Possible overlap areas pinned out of the way to continue basting

In some cases I may even applique a portion of the piece down so that I can baste another piece on top of it.  The idea is to baste as much as possible to have the greatest amount of uninterrupted applique time!

Speaking of applique time....  Jeana's class, where I fell in love with hand applique, was also the beginning of my obsession that has led to a houseful of quilting UFO's (UnFinished Objects).

Realizing that many of my quilting brethren suffer from this same obsession, I wanted to pass on a technique for finishing projects that was recently passed on to me.  Now, before I share, I need to state that this came directly from my yahoo group.  I tried to research the originator but was unsuccessful.  I only found numerous references to it appearing in various blogs and quilt related newsletters.  I would like to share  THE POWER OF 10.

The "Power of 10" in quilting does not refer to a higher mathematical formula. Instead, it is a simple way to complete quilt projects that we want to finish before.

1. Simply find the projects that you are no longer interested in completing and pass them on to someone who would love it as much as you once did.

2. List 10 projects that you would like to complete. Now remember "Only 10" projects are to be on the list.

3. Begin working on the projects on the list and spend three hours toward completing it.

4. Keep a list of projects and the hours worked.

5. Once three hours are spent on a project move to the next. A quilter's interest wanes and is usually spent after three hours. Now if a project requires two to four hours it doesn't matter. Simply finish the project. Feel good about finishing it.

6. Find another project and add it to the list. Remember, only Ten Projects are your focus.

7. Continue to rotate the projects you are working on.

8. List the supplies needed to finish your projects.

9. Shop at Local Quilt Shop for items needed to finish your projects.

10. The `Power of Ten` becomes reality when you are able to share your project.


Ricky on the left, Lucy on the right

On a different topic altogether, I would like to introduce everyone to Ricky Savage.  Ricky is a 16 week old German Sheppard puppy and my birthday present.  He has bonded quite nicely with his harem, Lucy and Ethel, and is quickly realizing females rule the home!  And before you ask, Fred is going to be a goldfish!
All of our puppies have grown up to be excellent Fabric Guard Dogs.  Here is Ricky taking his Fabric Guard Dog Oath.
I promise to protect Mommy's sewing room!


Fabric Guard Dog on Duty!
 And here is Ricky on his first guard dog shift! 


Until next time...

Best stitches,
Mercy in Miami

Sunday, September 25, 2011

Getting Better Organized

Color Inspiration for Nasturtiums Block


Too messy for my comfort!
Hi gang!  I hope everyone reading this is doing well and enjoying a change of seasons.  Here in Miami it's still HOT and HUMID.  That means Miami quilters are all still indoors with the air conditioning on high and busy working on projects.  If you are like me and busy in your sewing room, sometimes the mess gets a little out of hand.  I don't seem to work very well in disorganization so I'm always looking for organizing solutions. 


My latest find is called the Iris Scrapbook Cart

Solution!
What I really like about this particular cart is that the individual drawers are closed containers that I can grab go!

That works well for transporting my projects to quilt group OR to the family room so I can sit with my family and still work on my projects.


Loaded with projects!


One holds all my tools, then each remaining holds a project!

I loaded all my hand applique tools into one container (and because it closes tight there is no fear of loosing needles, pins, thimbles, or other tiny tools).  I loaded the remaining containers with individual projects. 


Much neater!


My sewing room is still not perfectly neat but it's so much better!


Nasturtiums Block
 For those of you following along, here is my latest block in Jeana Kimball's Cottage Garden class.  I have never seen a Nasturtium flower in real life so I took my color cues from our tropical red orange/yellow flowers.  I'm really happy with how it turned out.     
Fabric Guard Dogs on Duty


I can't believe Lucy (on the left) and Ethel (on the right) are almost 1 year old.  They have grown into wonderful fabric guard dogs.  Ethel has an affinity for purple fabric and if I leave any within her reach it's hers! Lucy likes to lay close by and watch me stitch.


Until next time....
Best stitches,
Mercy in Miami

Thursday, August 18, 2011

Not Every Painting Needs to Be Important


Hi gang!
I hope all of you reading this are enjoying a wonderful summer (or for those in the Southern Hemisphere an uneventful winter).  Miami has been hot, humid, and rainy for the last few months – i.e. perfect quilting weather!  We lock ourselves indoors, make huge pitchers of iced tea, crank up the AC, and curl up with our projects.  Other members of my household have found more traditional ways to keep cool.  Sometimes it’s a dip in the pool.

Ethel loves to swim!

Other times it’s sharing a popsicle.
My husband's hand with Lucy on the left and Ethel on the right

Many of you have written to ask if I was 'OK' because my blogging have been very sporatic since last fall. The truth is that I have had a very difficult year heathwise.  However, I am very happy to report that I am finally on the mend and will do my best to return to a more dependable blogging schedule.  One of the worst side effects of being ill was that it zapped my creative energy as well as my spirit.  After barely stitching or sitting at a sewing machine for a year it has been very difficult to dive back in.  Especially because most of my works in progress required either advance applique or very detailed machine quilting.  Everything seemed so overwhelming! But then I remembered some very wise advice I received from my graduate school painting instructor - not every painting needs to be important.  Wiser words were never spoken - at least to me directly!  Not every quilt you make, or every block you stitch, or every project you work on, or every book you read, or every show you watch, or every (fill in the blank) has to be SERIOUS.  A joyful life is made up of joyful activities.  It's perfectly ok to work on projects that are whimsical simply because it's FUN.  Remember fun?  Wasn't that the reason most of us started quilting?

So that's exactly what I did!  I picked out the most FUN project I had on my radar and decided to just enjoy myself.  I enrolled in a year long online class with Jeana Kimball, called A Cottage Garden.  Here is my first block of the project; Robin
It took me too evenings to stitch is block and I had the time of my life - no pressure, no worries - just fabric and thread and joy!

So until next time, remember to have a little fun every day!
Best stitches!
Mercy in Miami

Saturday, April 9, 2011

What Color Are Leaves?


Striped Leaves
For most of my childhood my definition of heaven was a box of crayons and a coloring book.  When I started first grade my parents splurged and gifted me with my first Crayola 64 box with the built in crayon sharpener.  I remember pulling each crayon out, reading the names, and lining them all up by color.  I loved each and everyone. 

In 1966, in Miami, Florida, on an especially nice afternoon, Sister Christine took the first grade class outside.  She sat us all in circle under a large banyan tree.  She stood in the middle of the circle and held up a crayon drawing of a tree; a brown rectangle topped by three green cotton ball shapes. She then handed each of us a piece of white craft paper and asked us to draw a tree.  Now, I was more of a coloring book type of kid.  I like choosing the colors and staying inside the lines.  I wasn't particularly interested in drawing my own pictures.  (Maybe that's why today I love to buy other designer's patterns and subscribe to BOM's.)  I copied the basic drawing, the rectangle trunk and the cotton ball shaped leave clusters.  I filled in the shapes using every color in my box - all 64 colors!  I remember feeling quite proud of my drawing.  I also remember Sister Christine's shadow falling over my paper and the paper being ripped from my hands.  She held the drawing up to the class and said "Children, please look at this drawing.  This is a perfect example of not listening to your teacher and not following directions."  Then the drawing was torn into several small pieces.  I was given another blank sheet and asked to do the assignment again but this time correctly.  But, we were sitting under a tree!  Couldn't Sister Christine see the colors were all there?  That my drawing was accurate?  Didn't she know that leaves were red and black and orange and brown and pink with only a tiny bit of green?  The trunk was dark red and purple and yellow - see!  I guess she didn't because she didn't accept my assignment until I turned in a brown trunk topped with exactly three, green, cotton boll shapes.

Polka Dot Leaves
Fast forward 45 years. I am here to say, without fear of another unsatisfactory mark in conduct on my report card, LEAVE ARE NOT JUST GREEN and TREE TRUNKS ARE NOT JUST BROWN.  The photo at the top of the blog is of a bromiliad with zebra striped leaves- how cool is that?  How about the polka dot leaves on the right?  They are yellow green with white polka dots on the top of the leaf and bright magenta on the underside of the leaf.

Below is one of my favorite trees in our local botanical garden.  It's a camouflage tree.  The photo does not do it justice.  It is shades of blue, grey, pink, yellow, etc.


Camouflage Tree


Use your imagination and use your stash.  Use the colors, textures, patterns, prints, values, and scale that speaks to your heart and eye.  Make sure that what you stitch brings you joy.  Isn't that why we all started to quilt in the first place? 


Potential Leaf Fabric


I recently took a quick trip to a local quilt shop and  found some interesting fabrics to use for leaves.  My guidelines for buying fabric is "If you love it buy it"  and "If you use enough variety of fabrics, they all go together" 

This was specifically an applique fabric finding trip.  I found water fabric, sail fabric for a clipper ship. a great red for berries, lace print, very small checks, and multi-colored ric rac for gathered flowers.  My chauffeur ( and wonderful husband) fell in love with the Superman fabric.  I will make a couple of pillowcases for his man cave. 
Quilt Shop Finds


20 1/2 Inch Square Ruler

However, the FIND of the trip was a 20-1/2 inch square ruler.  Unless you are an appliquer you can't appreciate the pure joy of this find.  I am a Baltimore style applique enthusiast.  The original blocks were in a large scale - 18 inch to 20 inch or more finished size.  I also like to have the option of a larger scale block.  For 2 years I have been working on a quilt made up of 13 - 18 inch blocks set on point.  I have had more than one sleepless night fretting about how I was going to square up and trim a block that size (on point) when the largest square ruler I had ever found locally was 16-1/2 inches.  I actually did a happy dance right in the store. 


Here are a few more photos from our local botanical garden.  I find them very inspiring. 

Until next time,

Best stitches,
Mercy in Miami


Lucy and Ethel