Showing posts with label Baltimore Album BOM. Show all posts

Monday, November 19, 2012

Santa Maria Ready to Sail - Almost


Mercy at the South Rim of the Grand Canyon, Arizona, USA
 October 2012

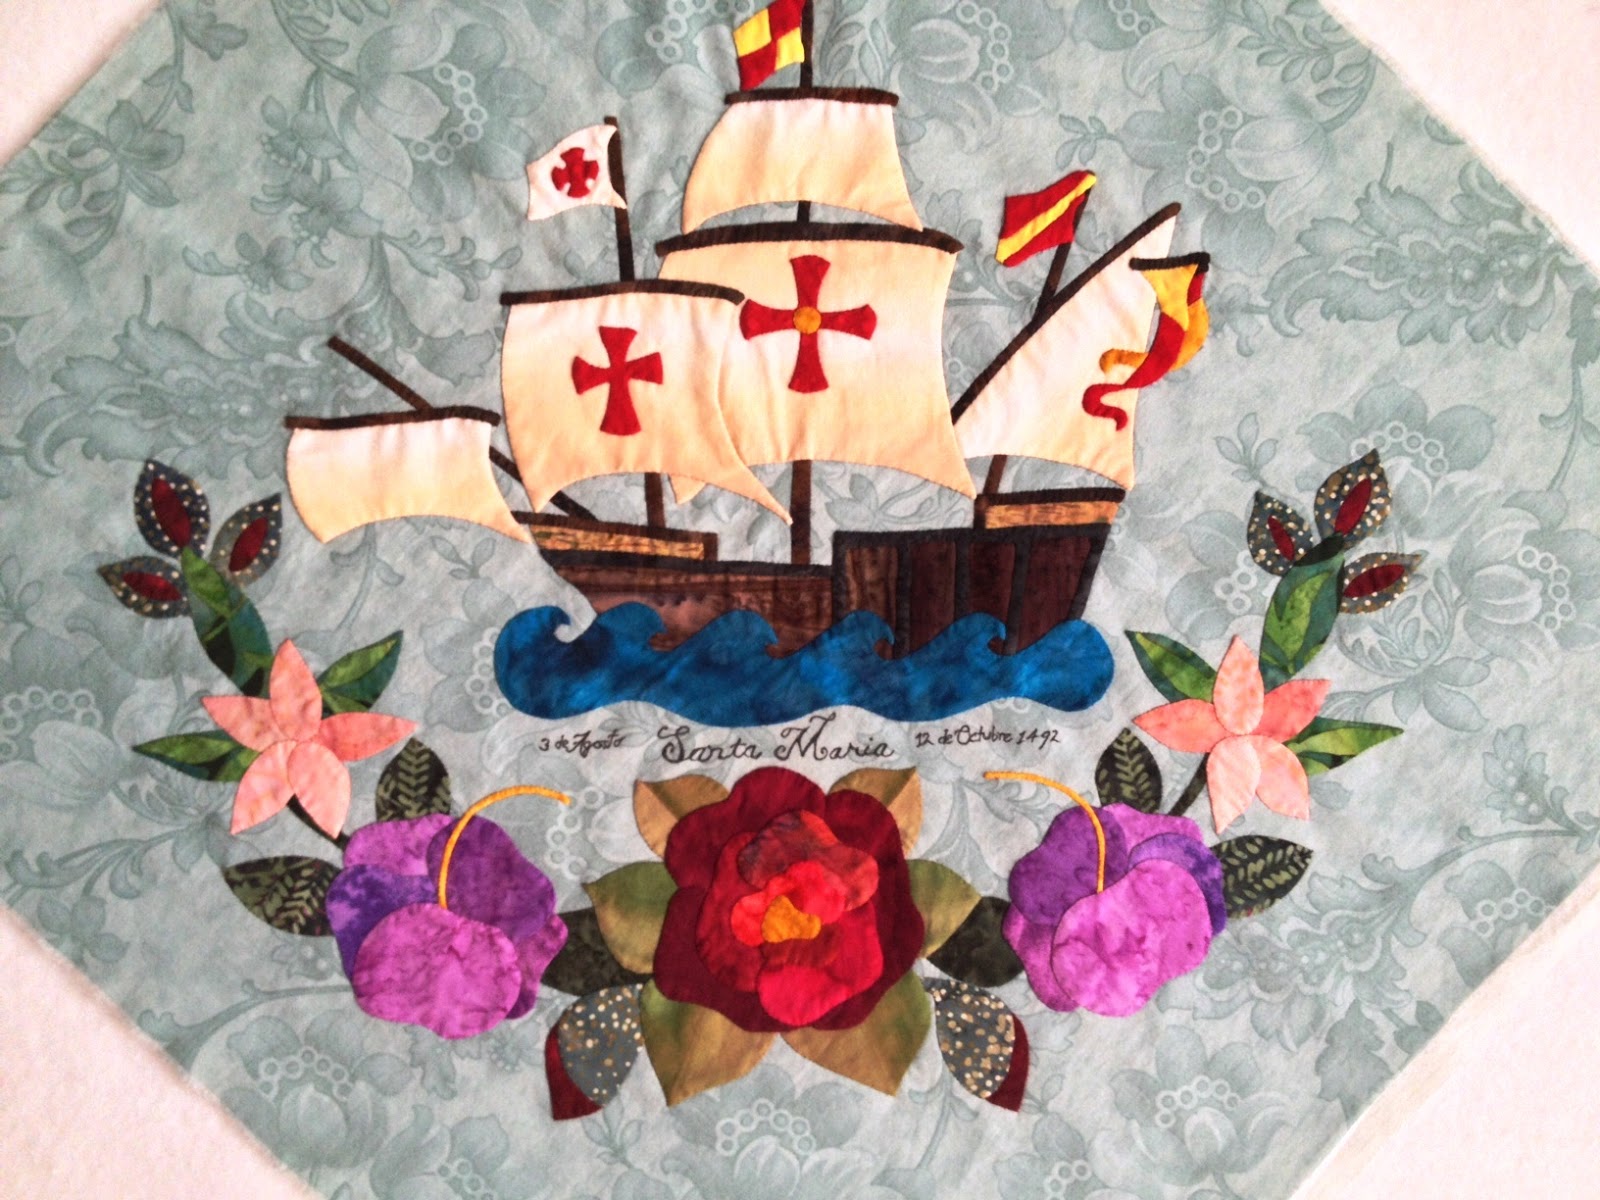
Santa Maria, original design my Mercy Savage 2012

Close up of the New World Rose on the Santa Maria Block
Greetings from the South Rim of the Grand Canyon, Arizona, USA!   It has always been my dream to see the Grand Canyon in person and a few weeks ago my dream came true  There are no words to describe the majesty, the colors, the view; so I'm not even going to try!

I finally finished the applique portion of my Santa Maria block!  Yeah!!  There is still quite a bit of embroidery work to do before the block is ready to sail.  My plan is to applique as much as I can between now and the New Year on my Baltimore Album-style blocks and then begin basic embroidery in January 2013!  I plan to attend the Applique Academy in February and I will bring what I have finished with me to Virginia.  There are so many talented participants and I'm hoping to find inspiration, suggestions, tips, etc to continue on this journey.

Happy, Healthy Thanksgiving to all!  I am always very grateful to my blog readers for you comments and encouragement!

Until next time...
Best stitches,
Mercy in sunny Miami (via a quick trip to the Grand Canyon)

Santa Maria sails minus the embroidered rigging


Close up of the Ship body and the waves


Santa Maria Flowers minus embroidery


Mercy at Hermit's Rest, Grand Canyon, Arizona, USA October 2012


Thursday, September 6, 2012

Basket of Roses...To Layer or Not To Layer, That is the Question


Closeup of my block Basket of Roses, pattern by Elly Sienkiewicz.  Each petal is appliqued from a separate piece of fabric.  Top, large petal is padded with thin, cotton batting.

I finished the applique portion of another block in my Aqua Album quilt last night.  I call this block Basket of Roses.  Again, the pattern is by Elly Sienkiewicz and can be found in her books.  There were a few lessons learned and a few more grey hairs earned stitching this block that I think you may find interesting. 


Basket of Roses
First, there were a few opportunities for reverse applique in the flower centers.  Notice the yellow centers in the purple trumpet shaped flowers, the polka dot rose centers, and the rosebuds.   None of these shapes are needle turned so this is a wonderful spot for me to you specialty fabrics that are gorgeous but impossible to needle turn.   The hand dyed silks were a breeze to use.  If did pad the underneath of the silk with a very thin cotton batting just to give the fabric a little heft. 


Hand-dyed Velvet Rosebuds
The hand-dyed velvet was another matter all together.  It pinkish red velvet buds had so much bulk from the nap of the velvet under the green batik that it was impossible for me to keep flat.   The result was very interesting but I doubt I will use velvet again in this fashion any time soon.  


 The large roses for this block are drawn on the pattern the same way as the large roses on another of Elly's patterns (Urn of Roses block). I worked on the Urn of Roses block in a class and the instructor had us cut the rose shapes from a single piece of fabric (Not Layered).

The petals were defined with embroidery.  The result is nice. I think once I add a little embroidery to the centers I will like the overall block more. 


Roses cut from a single piece of fabric

The look is not my favorite so in the Basket of Roses block I appliqued each petal separately (Layered).  I padded the top petal to give the block a little dimension.  I love the look so much more and time-wise it did not take significantly longer to stitch.  But at least now I know how the two looks stitch up and I can pick and choose from my arsenal of techniques!

My Urn of Roses block, pattern by Elly Sienkiewicz


I will try to finish the drawing of my Santa Maria ship block tonight so that I can begin stitching SOON.  I would love to finish the block by October 12th, the same day Columbus discovered America (or as he thought, found Japan!)  

Until next time...


Best stitches,
Mercy in Miami
 

Friday, August 24, 2012

Applique Hurricane Preparations!


View from my sewing room.  I am very blessed!
As I write to you dear blog reader, we are waiting for Tropical Storm Issac to decide on its path.  I have my battery powered light box and Ott light dusted off so that I can continue to stitch if the storm does come our way and happens to knock out power in our area.  My husband mentioned something about the list of emergency supplies extending beyond fresh hand sewing needles and battery powered lighting but I suspect they are not as essential as my stitching supplies !
Grape Wreath Close-up
I did want to share the latest block I finished appliqueing this week.  It's the Grape Wreath designed by Elly Sienkiewicz.  What did I learn while working on this block?  I learned that when working on a project that requires repetition, make sure you select a technique that you ENJOY.  I started this project using the Perfect Circle method and I was miserable because I was painting with starch and ironing and all this stuff that felt like crafting and not sewing.  Yes, my circles looked very round but my spirit was very flat.  I switched to needle turning the circles and not only did I actually finish the block, I enjoyed stitching every single grape!  I don't even care that they are not perfectly round.

Grape Wreath Block designed by Elly Sienkiewicz
Another lesson learned had to do with color.  Every pink, purple, red that I auditioned for this block looked OK but did not excite me.  Then as I was enjoying a plate of fruit salad that included different varieties of grapes I got the idea to mix and match the grapes as they appeared in my yummy salad.  Once I added the yellow and green grapes the whole block came to life. The contrast in color and value gave the block the ZING that I was striving to achieve.  True, the block does not follow the Baltimore Album style tradition based on color choice.  However, I am honoring the spirit of the early stitchers by applying artistic principles of color and composition.  I hope the many wonderful and talented traditionalist forgive.  I have no self control when it comes to color!

Santa Maria Block sketch designed by Mercy Savage
Every Baltimore Album style quilt needs a ship block.  Born and raised in Miami, and as a second generation Cuban American, I thought it would be nice to honor my heritage by stitching Columbus's ship, the Santa Maria.  Of course I couldn't find a pattern for it so I drafted one.  I'm still contemplating it on my design wall but here is a sneak peek at what I have so far.


Just for fun I wanted to share what's growing in my garden these days.  This is one place where I draw lots of my color inspiration.  Enjoy!

Avacado
Hibiscus

Bougainville

Orchid
Rose
Until next time...
Best stitches!
Mercy in Miami

Monday, August 13, 2012

Four Years in the Life of a Baltimore Style Album Quilt


Close-up of Ruched Rose Wreath.  Design and inking by Elly Sienkiewicz

First eight blocks in progress

As I was preparing my registration materials for the Elly Sienkiewizc Applique Academy over the weekend, I was inspired to put my in-progress Aqua Album blocks up on my design.  This project has been four years in the making and each block is a design from one of Elly's books.  Life has interrupted this quilt top's progress many times in those four years.  Fortunately, I was been able to overcame each challenge in turn and I never gave up on my favorite form of quilt making, needle turn applique.   When I as finally able to reacquaint myself with my Album-style blocks, the first thing I did was review each block and see what still needed to be done.  I was shocked to realize that of the eight blocks started, NONE are finished.  Plus I still have another 5 blocks to make to complete a 13-block setting.  I was struck as to how little I had accomplished in four years and how much still needed to be done.  And then I realized, I am in the middle of one of my all time favorite projects.   I am completely happy in the process and grateful each time I pick up my project and can stitch.  Some people are about the destination, but I, dear blog reader, am all about the journey.   I hope my photos motivate you to enjoy your journey and not give up on your passion, no matter what life throws at you.

I recommend the following sites to those of you that would like to learn more about Baltimore-style Album quilts (BAQs).

And of course, Elly's site
 

Pastoral Peacock (Design by Elly Sienkiewicz)


The Peacock's eye is embroidered.  Now I need to do the same to the leaves and the rose buds.  Definitely, need some rose moss here and there.


Grape Wreath is the block I am currently stitching (Design by Elly Sienkiewicz)


You can see I am Back Basting each grape with a little bit of batting in each one!


Ruched Rose Wreath is my most finished block.  Elly did all the ink work on the block for me in a class in 2010.  I still have to go over it to darken a few areas and then heat set it.
 

Bottom rose is ruched velvet ribbon.


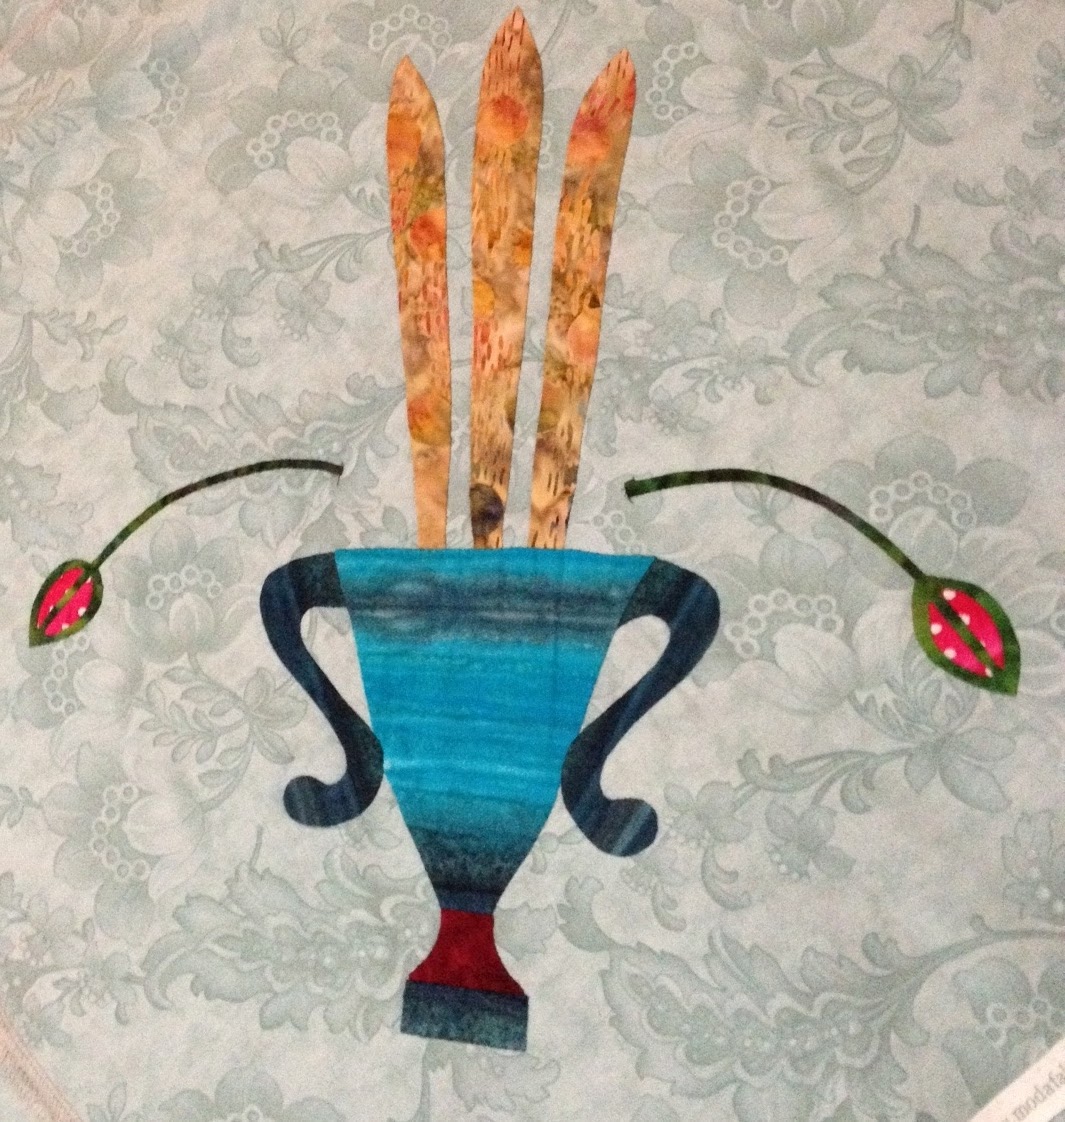
Victorian Vase  (Design by Elly Sienkiewicz).  Missing all the flowers and the leaves.


Victorian Vase Rosebud.  I just love the polka dot batik fabric!


Urn with Stuffed Roses  (Design by Elly Sienkiewicz)
 
Center, where pin is, is waiting for a vignette!


Rosebuds are crying for some moss.  This is a great spot to use fancy fabrics that you don't have to needle turn.


Woven Basket with Roses (Design by Elly Sienkiewicz)  that is missing the weaving on the basket front and the roses.  The rose buds are the bottom layer of reverse applique.  Notice I used hand-dyed velvet. 


Roses and Acorns

This block is not finished because I cannot decide how to make the flowers.  The pieces of ribbon are informally pinned on the block so that I can decide on color, texture, etc.

Until next time,

Best stitches,
Mercy in Miami


Thursday, September 1, 2011

Nature is carefree. Leaves are part of nature. Therefore, leaves are carefree!

I have been working on and off on a Teal Baltimore Album style quilt for a few years now.  I just love the project but sometimes working on formal style applique can be draining.  I decided this summer that I am going to approach all my projects with the intention of having fun and simply enjoying the process.  Here is the current block that I am working on (one I began May last year).

There are several elements in the block that required perfect placement to make sense.  For example, the eye of the peacock had to be located correctly in the head.   However, the 50 plus leaves do not have to be PERFECTLY placed nor do they all have to look identical.  I use Template Free (or Back Basting) almost exclusively for all my projects.  However, the thought of basting 53 leaves just zapped all the joy out of this block!  The same goes for freezer paper on top or prepared edge or...

But leaves ARE carefree.  They blow and twist in the wind.  They are all different colors and sizes.  So this is the technique I decided to go with to make stitching this block in the same carefree way as leaves exist in nature.  I chose a few general leaf shapes and cut them from freezer paper. 


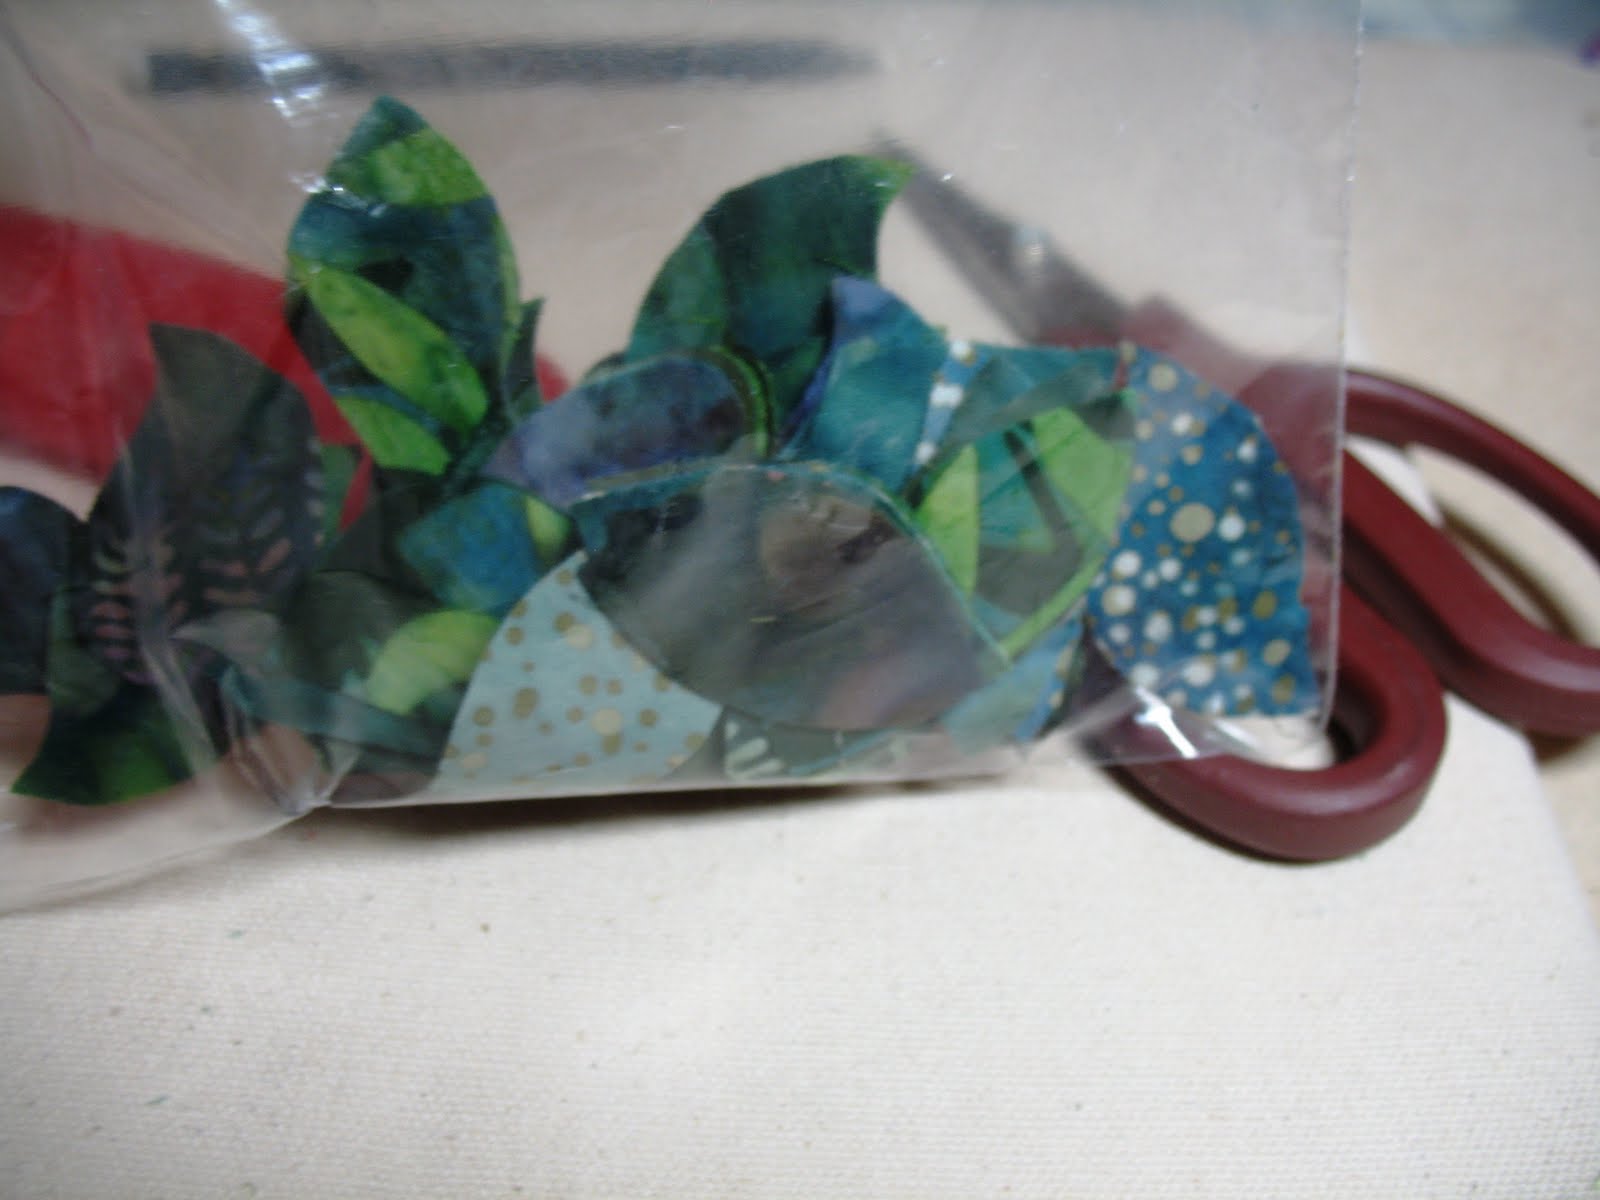
I then stacked 5-8 leaf fabrics one on top of each other.  I placed the paper leave template on top of the stack, pinned through all the layers,  and cut out the shape adding a generous 1/8 inch seam allowance.


I then placed all the leaves in a bag and shook the bag to mix up the leaves.


I used the pattern to guide me placing the leaves. I pulled out one leaf at a time and I used my trusty Sewline glue stick.  It’s one of the few adhesives that is made from chemicals that do not attract critters.  In addition, it’s very tacky instead of wet so it sticks and dries almost instantly.  Woohoo!  I prepped a portable block to stitch on the go and it only took a single short session to complete!  Plus, the random nature of the fabrics and placement was lots of fun.

For those of you that this technique is way too carefree, a light box can be used to place the leaves.  If you don’t have a glue stick that you like, the leaves can be pinned and later thread basted to make the project portable.

The block is now ready for needle turn stitching.  After appliqueing for a while most of us can eyeball a standard seam allowance.  However, a bonus of this technique is that each leaf will be different without a lot of effort.  Remember, variety is the spice of life and the key to visual interest!

Happy Labor Day weekend to my USA blog readers!  I hope everyone has a wonderful long weekend surrounded by those you love.

Until next time,

Best stitches!

Mercy in Miami

Saturday, June 5, 2010

To Knot or Knot to Be ... Plus Inspiration from Key West


Hi gang!
I have started block 9 of my Baltimore style quilt.  Block 9 is a fruit basket.  I'm using Sandra Leichner's pattern, Traditional Still Life.  By the way, for Sandra's fans, she has made several of her patterns available for sale on her website.  That will have to hold us over until her new book is published in October!


So far, I have only completed the pineapple that sits at the top of the basket.  I love to applique pineapples.  They are large, beautiful shapes that come to life with the simplest of embellishments.  For this pineapple, I used a chalk pencil to mark a simple grid on the diagonal.  I then used two strands of silk floss to make a colonial knot at each intersection.  I really like colonial knots because they nestle into the fabric with the "knot" sitting upright.  They are especially nice if you pad the applique piece with a thin layer of batting.  The knot then accentuates the dimensionality/stuffed effect. They do not flop over like French Knots.  Unlike a French knot, you cannot make the knot bigger by using more wraps.  Instead to make a bigger Colonial knot you need to use more strands of floss or use a thicker floss.


Colonial knots are not as common as French knots so many quilters are not familiar with them.  But, they are so quick and easy to stitch, and so versatile, that I decided to create a quick tutorial for my blog readers.
First my favorite tools.   I love this Clover Embroidery Needle Threader.  Unlike other needle threaders, it's sturdy enough that when you pull on it the "wire" it does not pull out or come apart in your hands.  It's thin enough to thread smaller embroidery needles but has an opening large enough to thread larger fibers.


For thicker embroidery threads or silk ribbon, I really like Clover Gold Eye Chenille Needles.

My other "Must Have" is Thread Heaven.  It really does tame the most unruly threads.  I wish the manufacturers also made hair care products!


To make a Colonial knot, thread your needle, pass your floss through the Thread Heaven, and hoop your  fabric.  I prefer Spring Tension 3 1/2 inch Embroidery Hoop.


Start the stitch by coming up from the back to the front right where the stitch will be.  Pull the floss toward yourself with your left hand.


Point the needle away from yourself and scoop the floss from left to right.


Then with your left hand wrap the floss up, over and under the needle to create a figure eight of floss.


Gently pull the floss with your left hand until the knot is formed around the needle.  Pull until the knot travel down to the tip of the needle.  Then insert the needle into the background right next to where it came up originally.


As you pull the needle slowly through and out the back, control the loop on top with your left thumb.


After you pull the floss to the back, travel between the background and the foreground to the next spot for the next knot.  This helps keep the background a little neater.


The stitch is really very simple, but a little complicated to explain; especially the up, over and under step to make the figure eight.  Since a picture is with a thousand words, a video should be worth a million words.  Here is a short (90 second) video,  How to stitch a Colonial Knot , that my husband recorded of me stitching a Colonial knot.  Hopefully, between the video and the instructions/photos above you too will soon be embellishing your projects with a new stitch!
While downloading the photos for this blog I came across a few snapshots from a trip to Key West in January.  The first photo at the top of the blog and the one immediately below is from Hemingway's house.   The rooster and hen are from a gas station parking lot.  I hope they inspire you like they do me!


What a great quilt setting!


Beautiful color - touches of brights in a sea of neutrals.  Nice.


Until next time....
Best stitches,
Mercy in Miami
aka The Savage Quilter